Do you create Power BI Template Apps?
Loading last updated info...
Power BI Template Apps are an efficient way to package, distribute, and maintain Power BI reports and dashboards for external users.
Once published, a Template App lives in the Power BI Apps marketplace, where users can install it and either explore it with the default sample data or connect it to their own data.
✅ Pros
- Ease of distribution: Once published to the Power BI service, a template app can be shared widely without having to manage access permissions for each user individually
- Ease of maintenance: Built-in Release Management makes it simple to update and maintain your Power BI content over time
- Data source flexibility: Users can connect their own data with minimal effort
- Trial with sample data: Shipping with sample data lets users explore the features before connecting their own — and it's great for demos
❌ Cons
- Dependency on Power BI: External users need access to Power BI (a Pro or Premium license), which can limit accessibility for some. Creating template apps also requires a Power BI Pro license
- Initial setup complexity: Configuring a template app for external sharing takes more upfront effort
- Limited customization for end users: End users can filter and slice the data, but they can't modify the reports beyond that
- Performance considerations: Large datasets or complex visuals can slow loading times for end users
Creating Power BI Template Apps
Prerequisites
- Power BI Pro license
- Power BI Desktop (Windows only)
- Mac users - either borrow a Windows machine, or run a Windows VM on VMware Fusion (free - recommended ⭐) or Parallels
- A cloud-hosted sample database with dummy data and read access
- Keep it small
- A Power BI report (.pbix) file to connect to the sample data
Step 1: Create the Workspace
In app.powerbi.com:
- All workspaces (left side panel) | New workspace
- Set a Name and Description
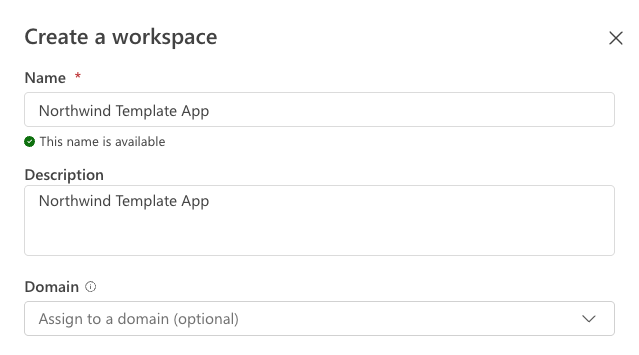
Figure: Create workspace wizard with Name and Description input fields
- Advanced section | Workspace type | Power BI Pro
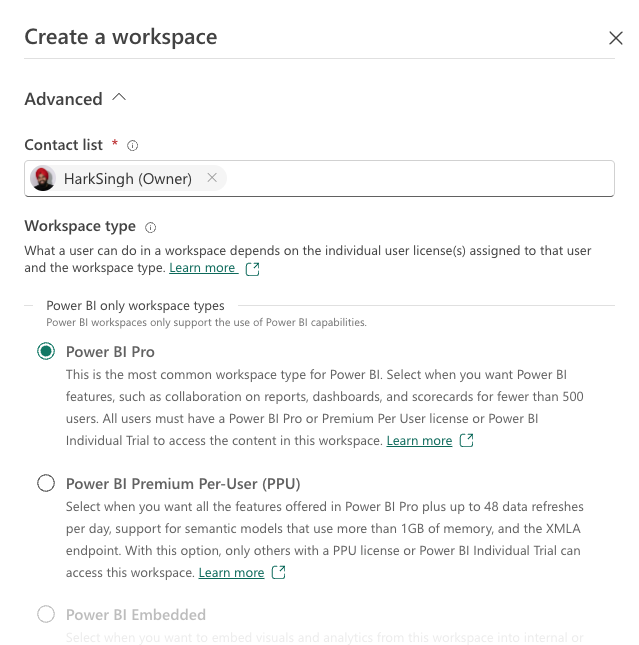
Figure: Select Workspace type options
- Advanced section | Template apps | tick “Develop template apps”
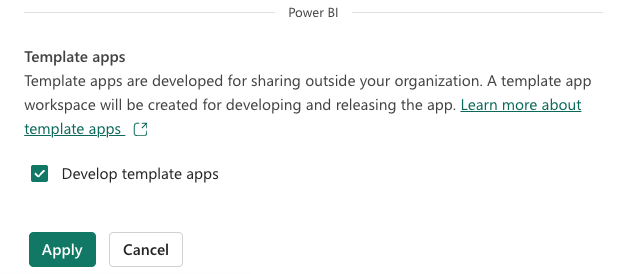
Figure: Develop template apps option must be checked
- Click Apply
Note: Once enabled, this setting cannot be reversed. Learn more.
Step 2: Prepare the Report with Sample Data
In Power BI Desktop (Windows only):
- Open your
.pbixfile - Home | Transform Data - this opens a new window
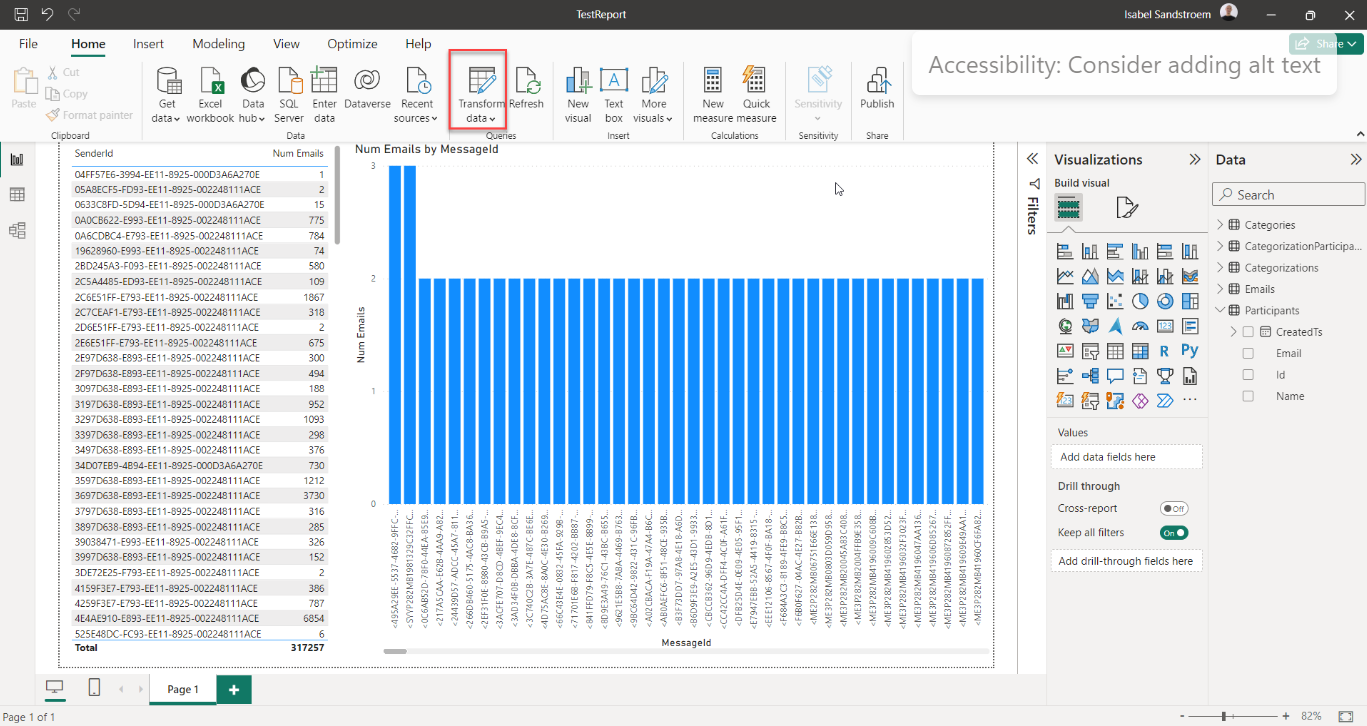
Figure: Power BI Desktop app
- In the new window: Home | Manage Parameters
- Here you can add new parameters, set their default values, or edit existing parameter names and values
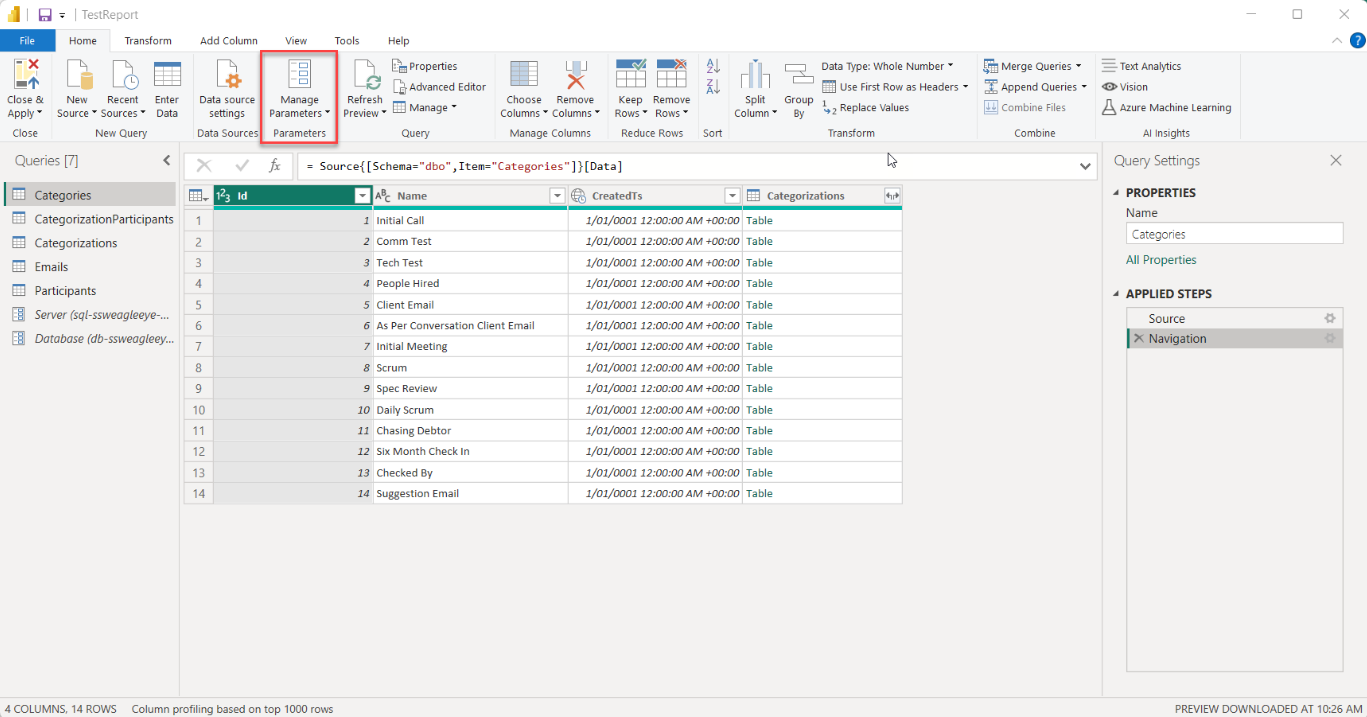
Figure: New window showing the queries, parameters and source settings
- Create parameters for your SQL Server and Database Name, and default them to your sample database's details
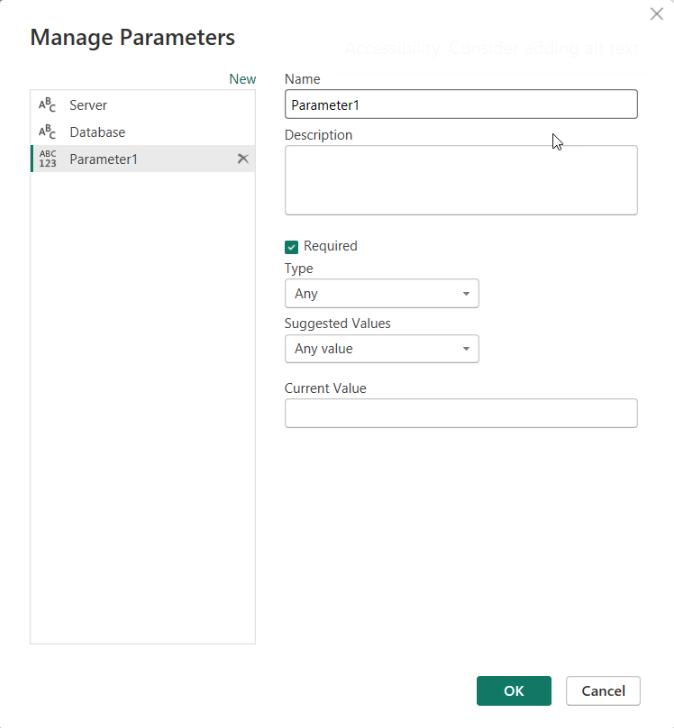
Figure: Edit / create parameters for your report
- Back in the Transform Data window, the new parameters appear in the left pane
- Point each query's source at these parameters:
- Select a query in the left pane
- Under Applied Steps (right pane), select Source
- In the formula (fx) bar, replace the hardcoded values with your parameter names - e.g. change
Sql.Database("sql-server.net", “demo-db”)toSql.Database(Server, Database) - Repeat for every query whose Source step still uses hardcoded strings
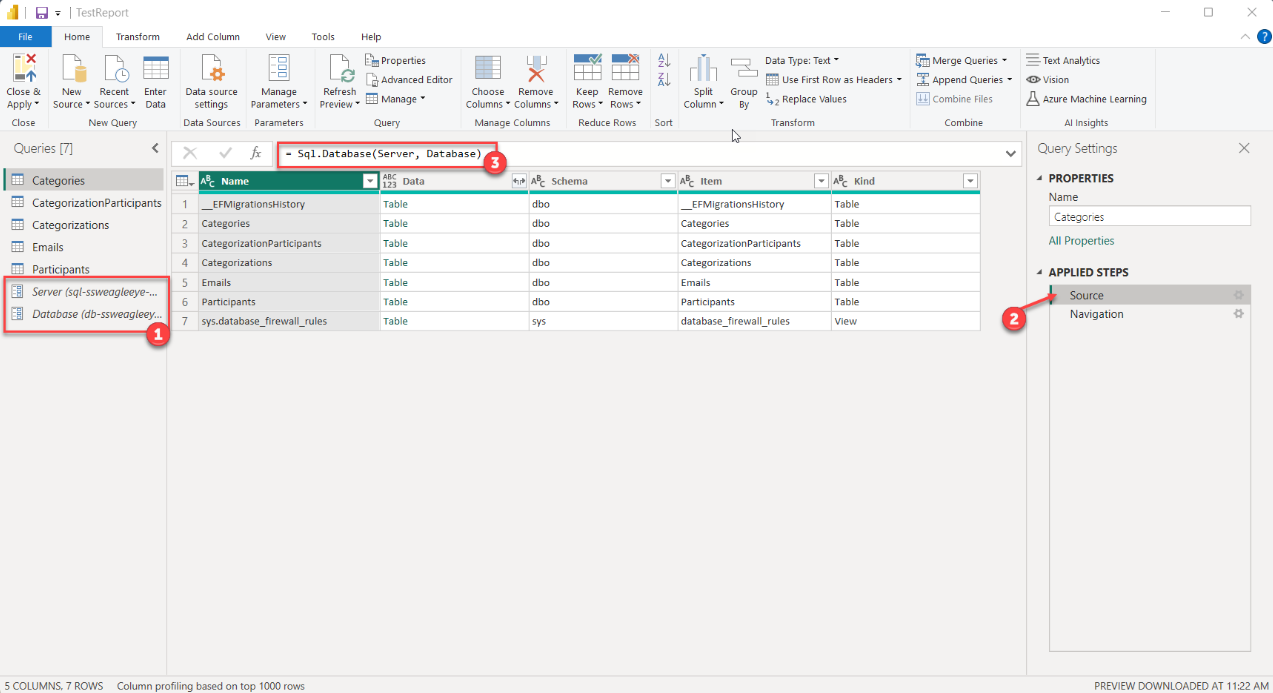
Figure: Left pane showing Queries, right pane showing Source and middle function input box for parameters
- Click Close & Apply - the whole report will refresh
- Publish the
.pbixto your template app workspace:- Home tab | Publish
- Sign in with the same account that owns the workspace
- Select your template app workspace and click Publish
- If a report already exists there, confirm the overwrite when prompted — the report then uploads
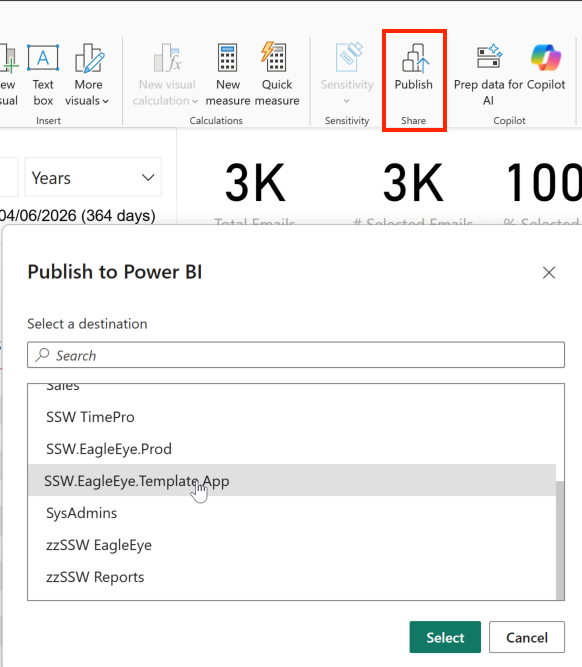
Figure: Select your template app workspace to publish your report
- Refresh the workspace in app.powerbi.com - your report will appear
Step 3: Create and Configure the Template App
Back in app.powerbi.com:
- In the workspace, click Create app
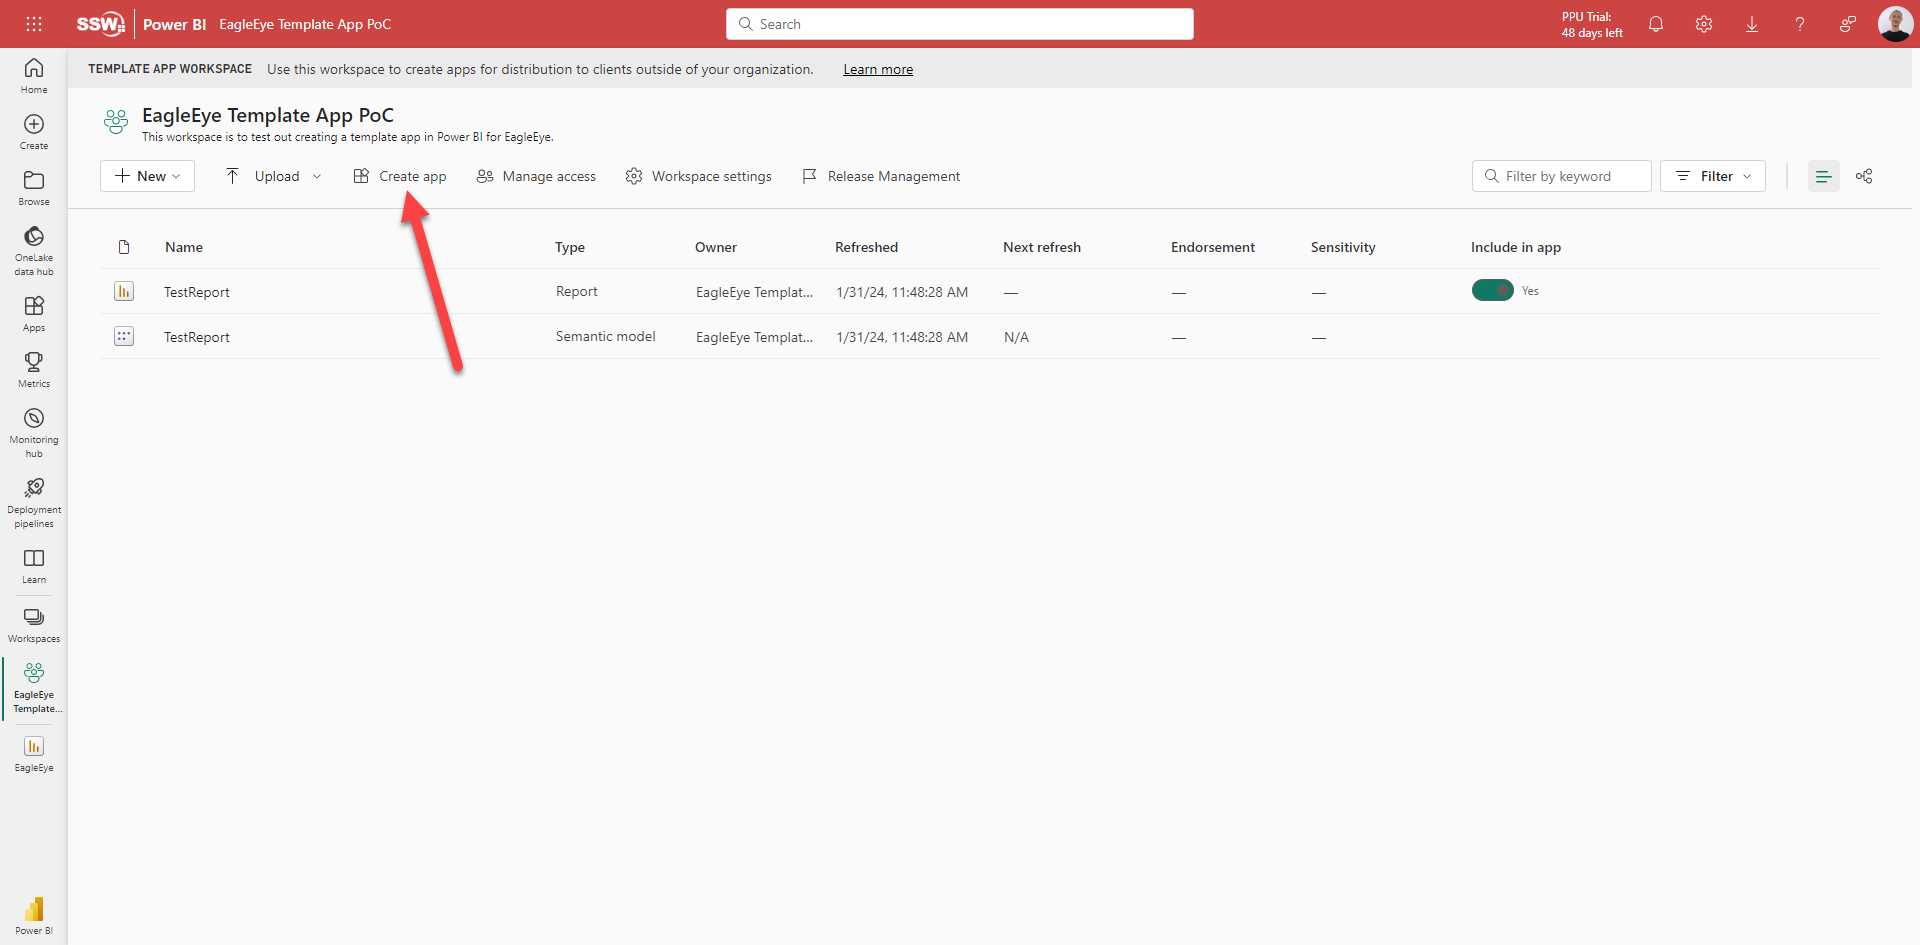
Figure: Workspace - Create app
- Fill out every field in the form
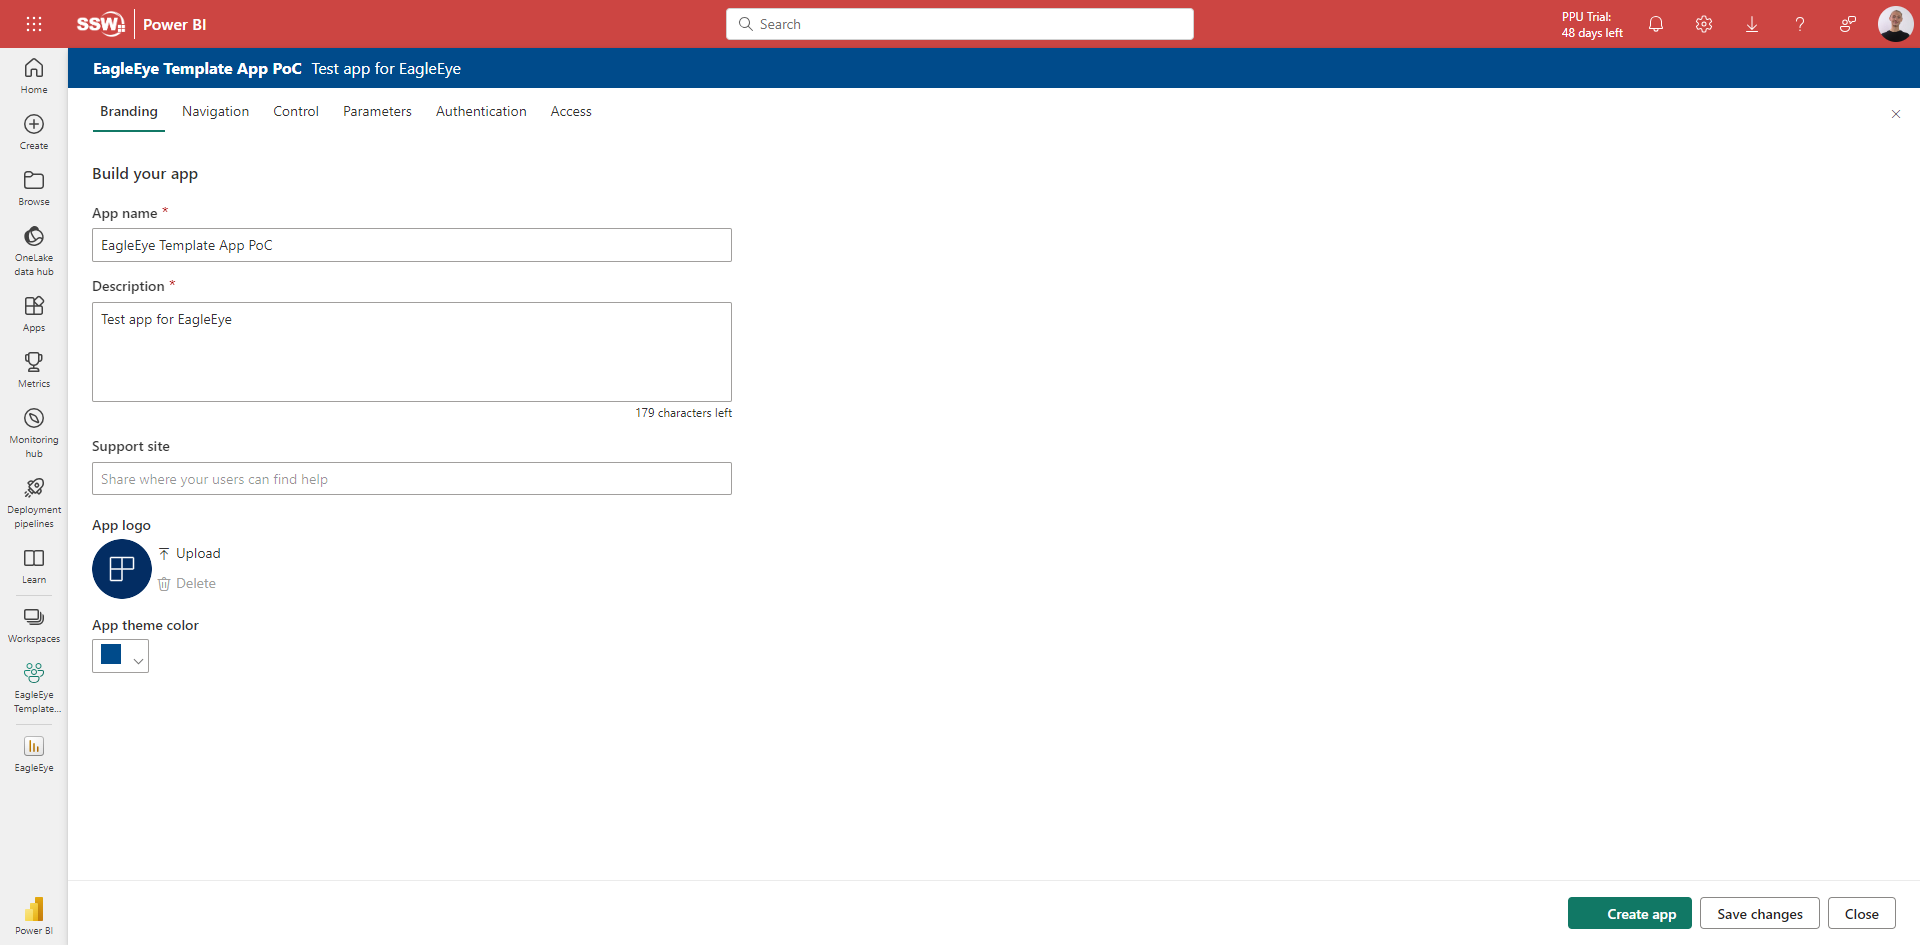
Figure: Create app - fill out the form fields
- On the Navigation pane, your report is selected automatically for inclusion in the app
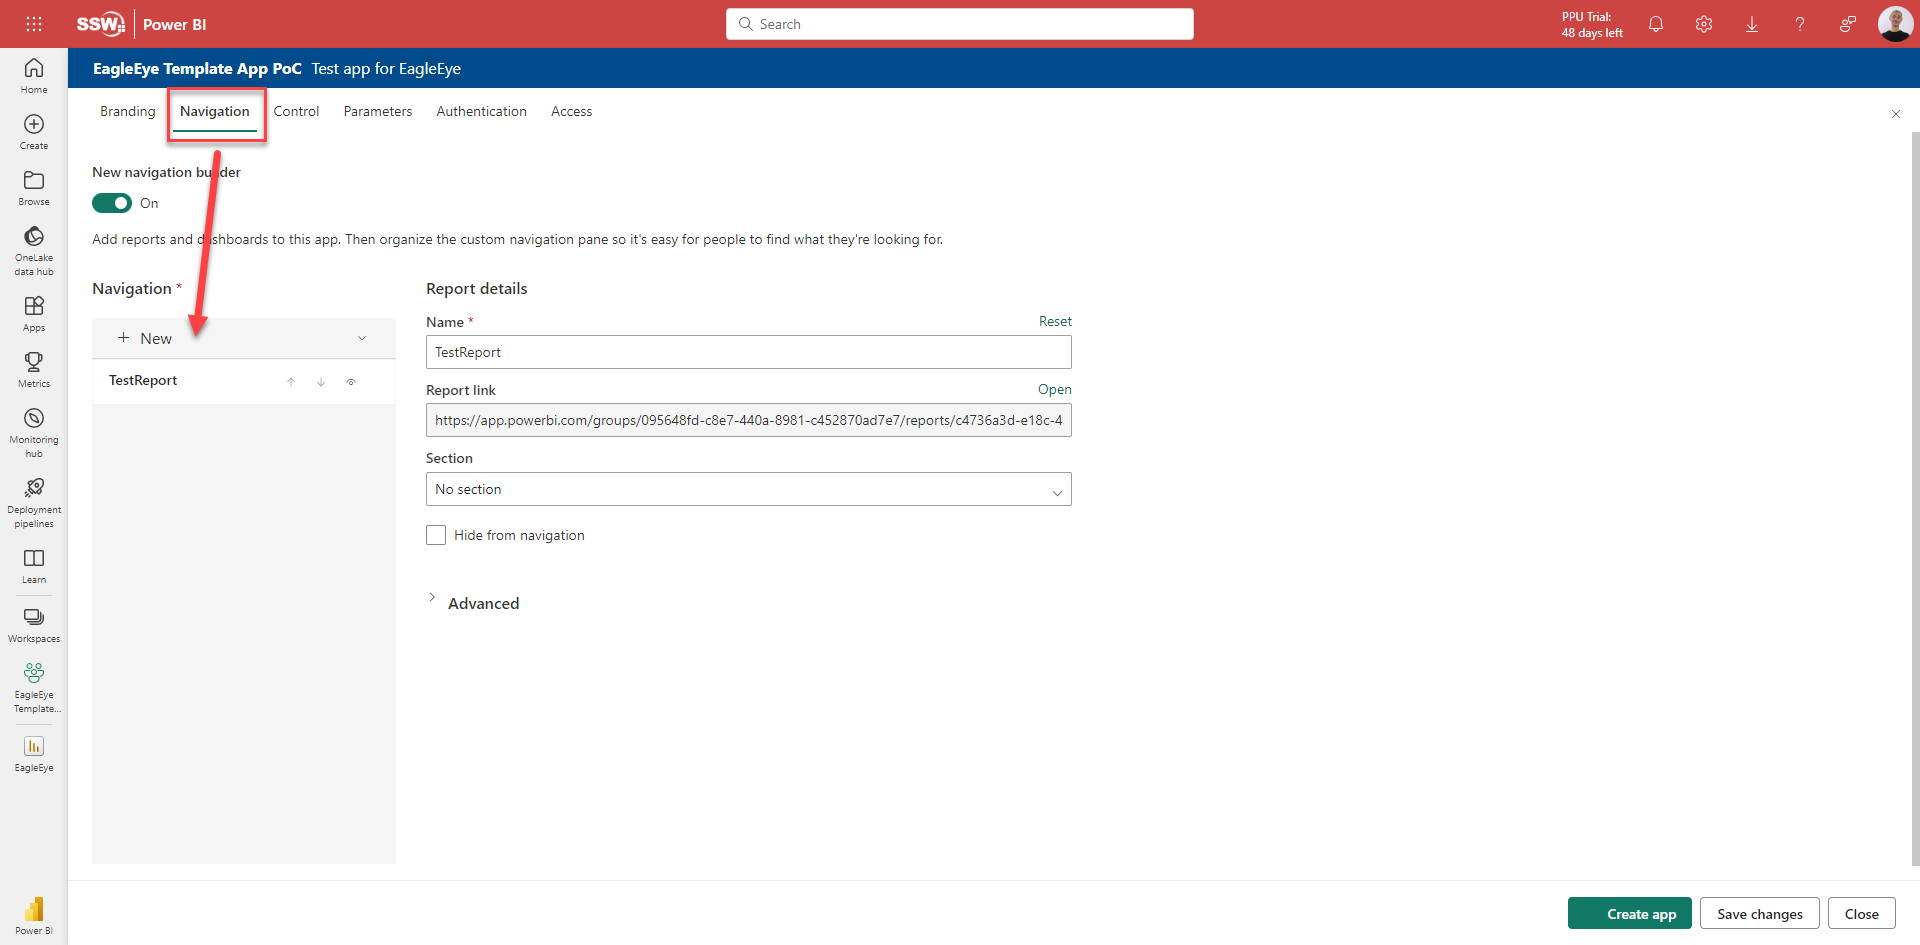
Figure: Create app | Navigation - report auto-selected
- On the Parameters pane, you'll see the parameters you set up in Power BI Desktop. For each one:
- Tick Required
- Enter the same value you used in Desktop
- Add an example to guide users - e.g. Server value
sql-demo-database.windows.net, example for usersql-xxx.database.windows.net
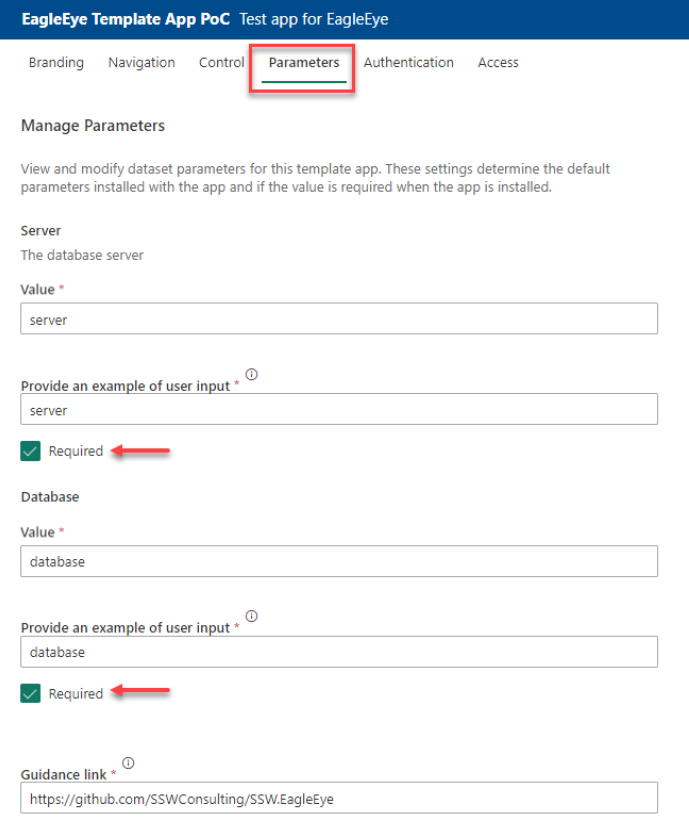
Figure: Create app | Parameters pane - set Server and Database values
- In the Authentication section, the source defaults to SQL Server - set the authentication method to Basic
- In the Access tab, grant access to other users in your org for testing, or select the entire organisation
- Click Save changes, then click Create app
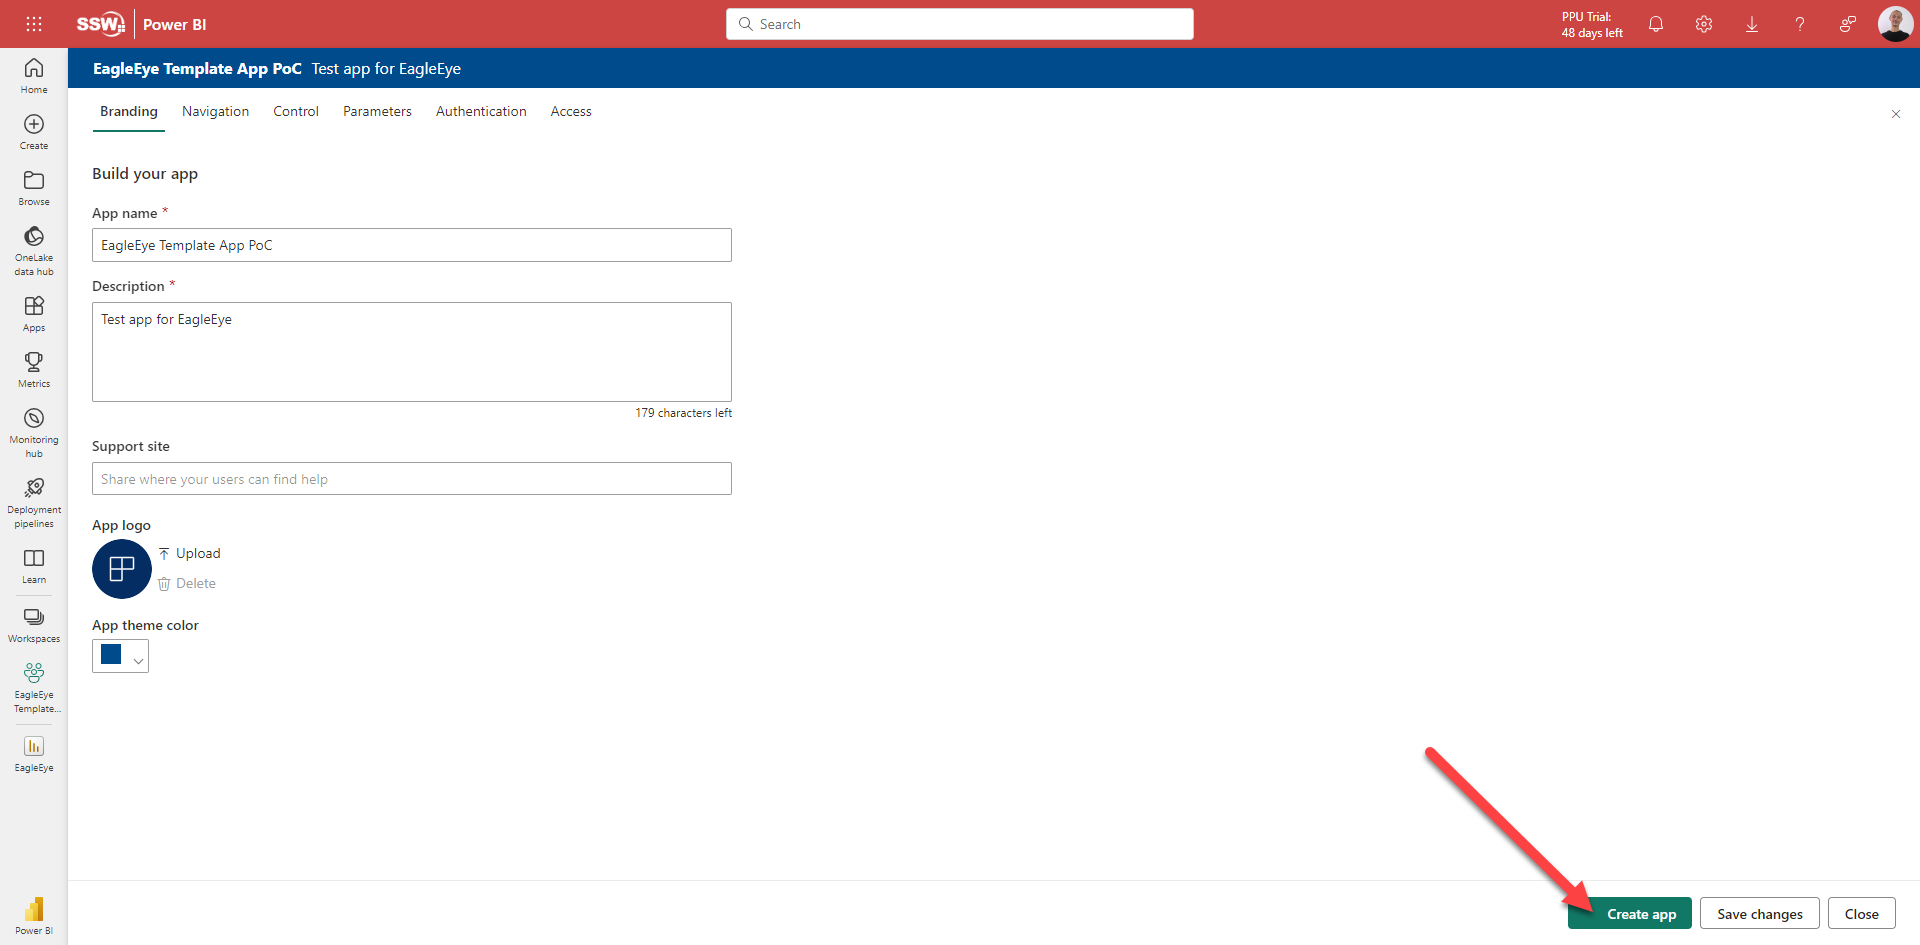
Figure: Create app - confirm and build the app
- After a moment, Power BI gives you a link to test the app internally within your org
- Manage the app in the Release Management pane, where you can:
- Update the app with new report changes by clicking Create app
- Share the app with specific people for testing by clicking Get link
- Publish the app by clicking Promote app
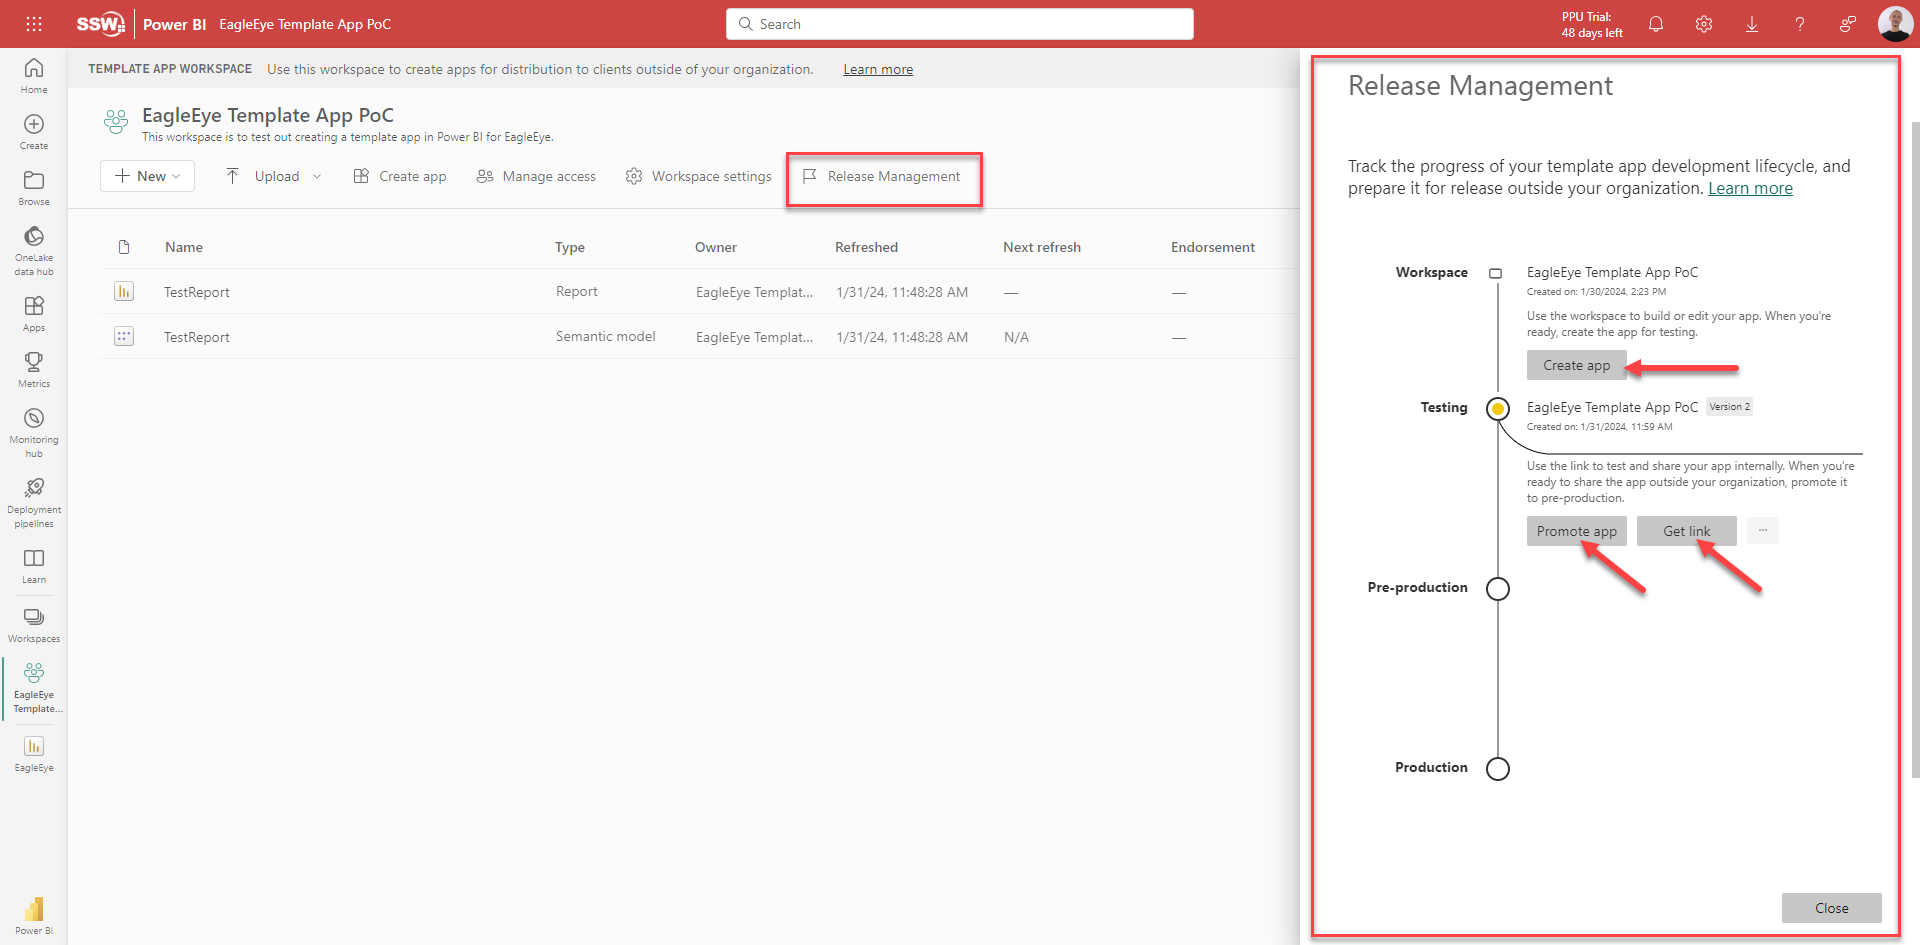
Figure: Release Management - Create app, Get link, Promote app
Note: Users must be granted access before they can use the link. Do this in "Manage Access".
Note: Reports in the app are read-only.
Step 4: Publishing to Partner Center
- After internal testing, promote the app to pre-production in Release Management
- Copy the pre-production link it generates, then log in to Partner Center and either create a new offer or open an existing one
- Fill in the required details
- In the Technical Configuration section, paste the pre-production link from Release Management
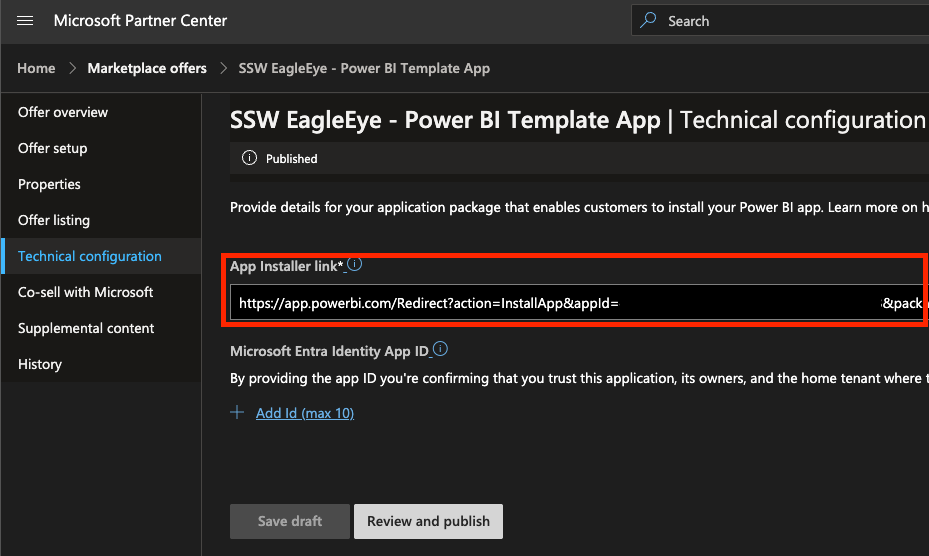
Figure: Microsoft Partner Center | <your template app offer> | Technical configuration
- Click Save draft, then Review and publish
Once publishing starts, it takes a couple of hours to generate the preview link. After you go live to production, allow another 5–6 hours for the offer to be published and for AppSource to pick up and verify your template app.
Once verified, users can install your template app from the marketplace and connect it to their own data.
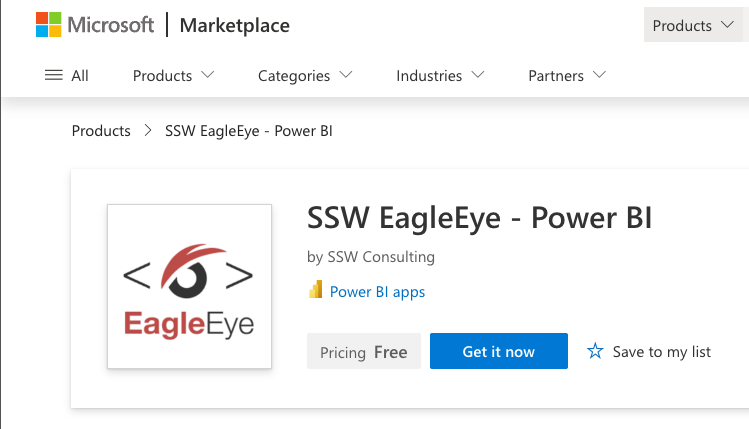
Figure: Published template app on Microsoft Marketplace
User Setup for Installed Apps
When users install and open the app, it opens with the default sample data. To connect their own data:
- Select Connect your data in the banner at the top of the page
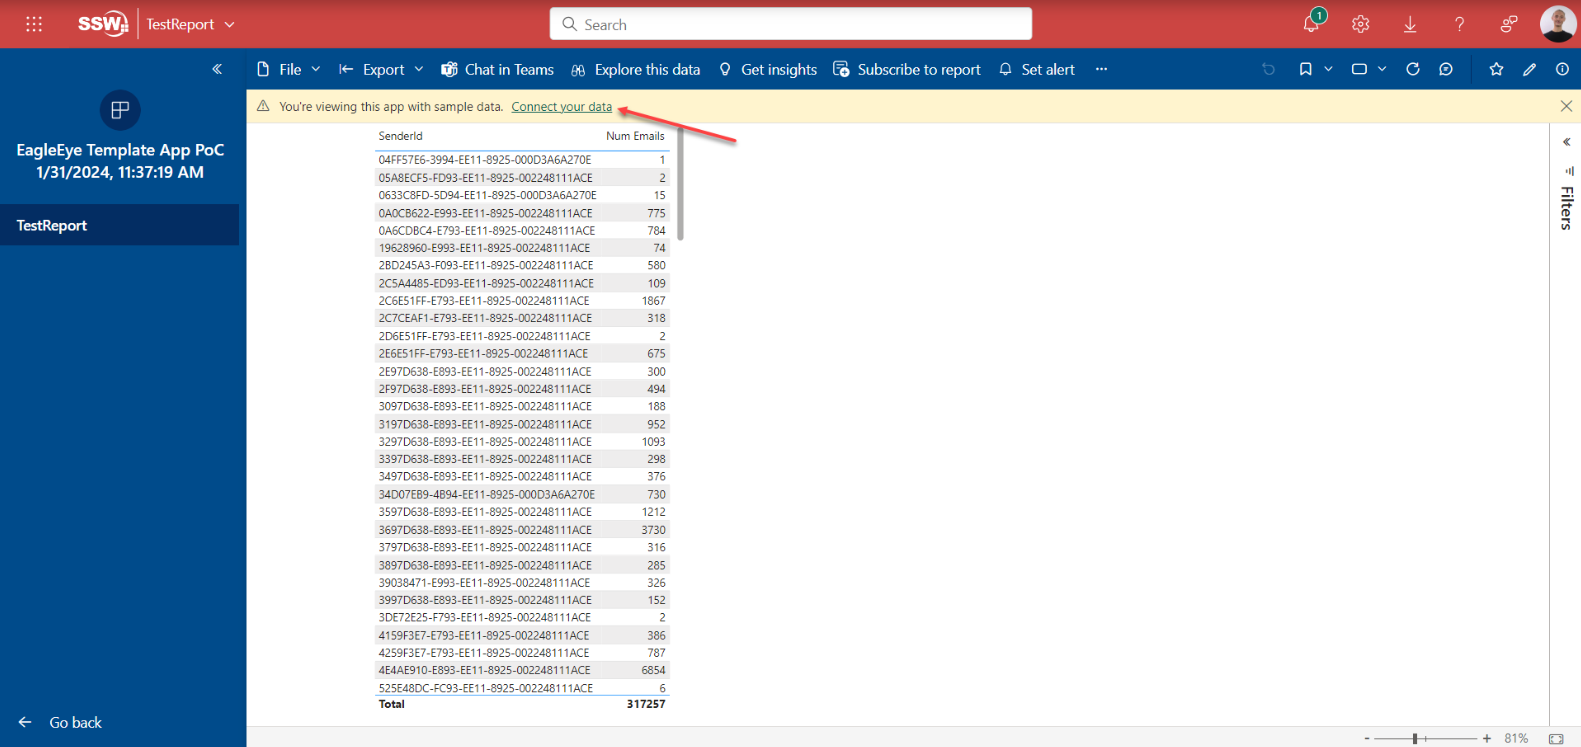
Figure: App banner - select Connect your data
- Enter the Server and Database parameter values in the pop-up
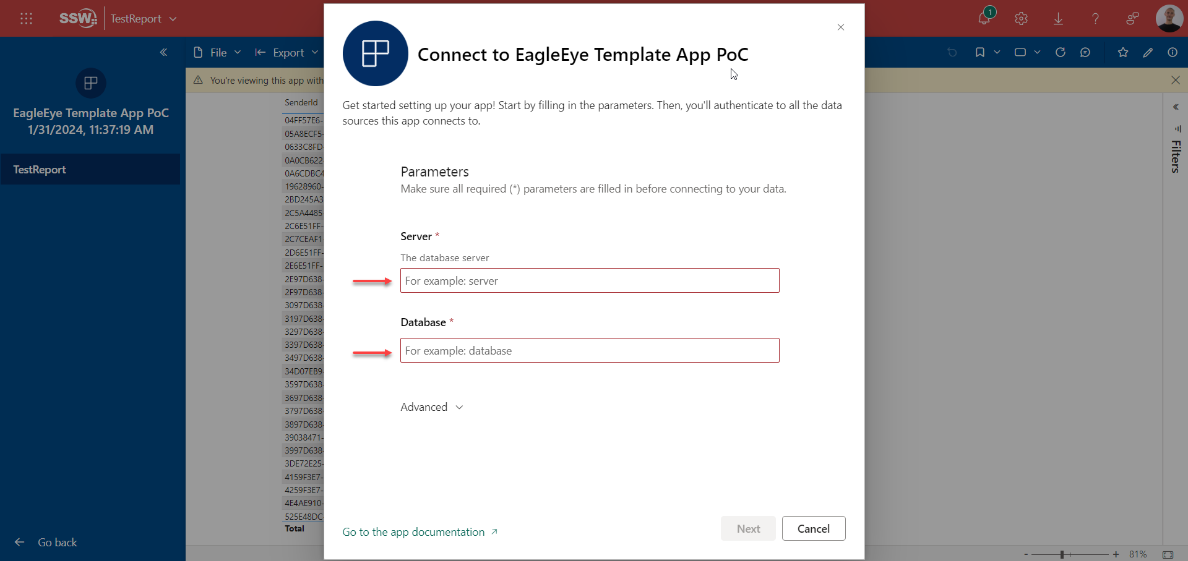
Figure: Connect your data - enter Server and Database parameters
- Authenticate to the database
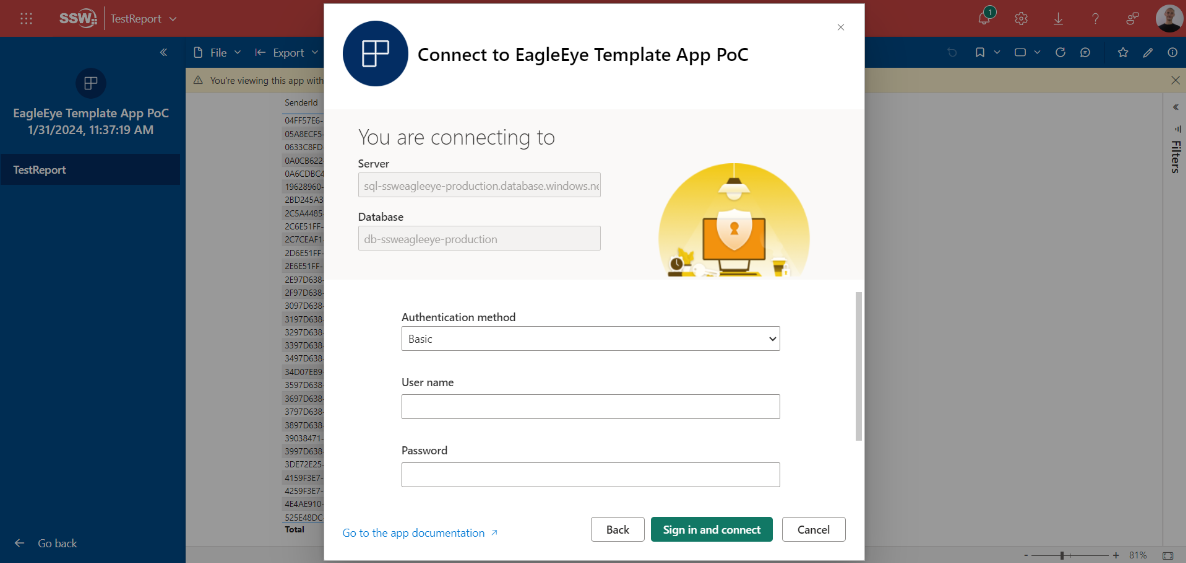
Figure: Connect your data - database authentication
- Once authenticated, users can explore the app with their own data 🚀